"And then said the holy virgin with a glad semblant: Do to me what torment thou wilt, for I am all ready to suffer it for the love of my spouse Jesu Christ, in whose garden full of delices I have gathered roses, spices, and apples."
Because of this, she is the patron of gardeners. Also of brides, and brewers.
Agenda Today:
1. Make Persian Spiced Apples
2. Garden journal queries
3. Garden visualization & plan
4. Cold stratify milkweed seeds
5. Make plant markers
1. Make Persian Spiced Apples:
You might like to make this exotic treat from St. Dorothy's homeland. The recipe is here.
2. Garden journal queries:
Most years St. Dorothy Day is when I begin to fantasize about changes in my garden. Today I will visualize each of the "rooms" in our yard: My front yard sanctuary garden, our duck yard, our vegetable garden, and the family gathering lawn. I ask myself -
How can I make my garden
- a healthy home for wildlife,
- a better sanctuary for my family,
- more comfortable for friends,
- a greater learning-experience for my grandson,
- more mysterious and secluded,
- more of a visual treat,
- more abundantly productive of food,
- AND easier to keep up with?
2. Garden visualization & plan:
The winter garden is a blank canvas for visualizing colors, shapes and composition. Today I took a notebook outside, walked around my entire yard once, and examined it in a non-critical way. I wrote down these ideas:
- Front yard sanctuary garden: Pick another tall bush or two to add to shield the front; move hollyhock. Build up the wall in one more spot? Add an umbrella?
- Hummingbird garden - plant more flowers.
- Try delphiniums and cornflowers.
- Duck yard - Put in bark paths? More comfrey
- Giant sunflower border along side of veggie bed and in front.
- Wall of tall flowers in driveway bed (sweet peas, foxglove, sunflowers, hollyhocks, mullein.).
3. Start Milkweed:
 Last fall I harvested and dried one of my milkweed pods, and it's been in the refrigerator. Now is the time to start the cold stratification process, so I can have new pants in the spring!
Materials: 1-quart Ziploc bag, milkweed seeds, paper towels, Sharpie pen, container
Directions:
1. Wet a paper towel and gently wring it out so it is damp but not dripping with water. Spread it out on a flat surface.
2. Sprinkle 10-20 milkweed seeds on one side of the paper towel, and fold the empty side over to cover the seeds, then fold again to make a square.
3. Place the paper towel into the bag, seal, and label with the date and type of seed. Put the seed bag into a container to keep the seeds safe from getting smooshed.
4. Set a reminder on your phone or calendar so you can remember to take them out in 30 days.
4. Check occasionally to ensure no mold is growing. If it is, wash it off immediately. If the seeds start to sprout in the bag, plant immediately! (Check the Save Our Monarchs for further guidance.)
4. Make garden markers:
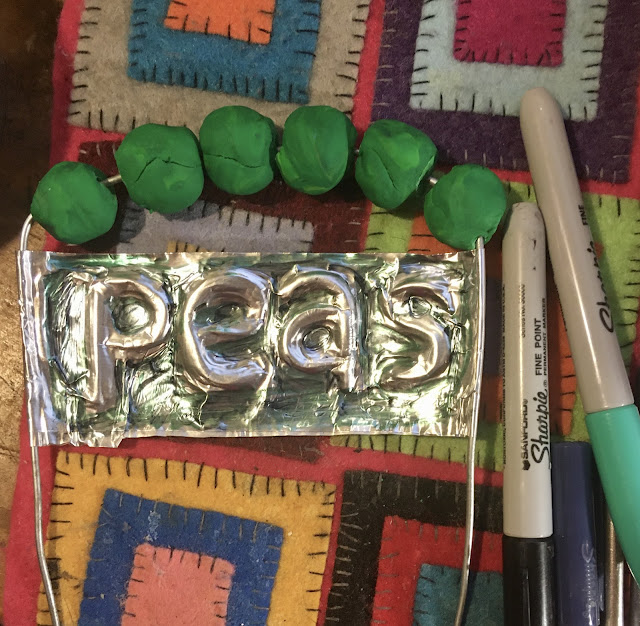
While it's really still too cold to plant, this is a great time to make some really nice plant labels for permanent plantings and for vegetable beds. I recently discovered this technique, using aluminum tape. Last year Image this Pea bed marker, and this year I'll make one for the beets and the spinach.
Supplies: Polymer clay (optional), wire, wire cutters, aluminum tape, crochet hook, permanent pens (optional)
2. We decided to make giant clay peas to add to the top of our pea marker. (My grandson had fun pretend-eating these!)
I rolled the peas and wrapped them around the wire, then baked the whole thing at 225º for 15 minutes.

3. Cut a piece of aluminum tape that will wrap all the way around the wire. Peel off the backing and wrap it.
then flip it over and write it again from the backside to make the letters pop forward.


No comments:
Post a Comment